Showing posts with label Homemade Pantry. Show all posts

Monday, November 11, 2013

Homemade Pantry: Pumpkin Bread

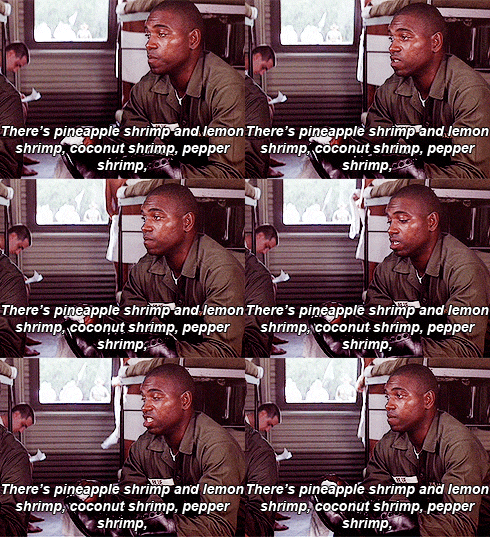
I know pumpkin is everywhere right now but I can't get enough.  Apples, I've had enough of.  Have I mentioned we have a ton of apples from our CSA?  I signed up for the base share and an extra fruit share.  Over the summer it was great, we got a ton of variety and the fruit was usually different from what was in the base share.  But for the fall we get apples in the base share and then we get MORE apples in the fruit share. I'm starting to feel a bit like Bubba in Forrest Gump.  I've made apple sauce, apple butter, baked apples, apple crisp, apple couscous, apple sausage and kale, and every day I eat an apple for a snack ... I'm over apples.


http://31.media.tumblr.com/tumblr_mdvib7eEl61ru1wbho5_250.gif
http://24.media.tumblr.com/tumblr_mdvib7eEl61ru1wbho4_250.gif


 Source

But I haven't gotten sick of pumpkin yet! We really like this pumpkin bread by Trader Joe's:


Super easy, just add eggs and water and bake. My kind of baking. But a couple of weeks ago I bought two actual pie pumpkins at Apple Annies in Greece, NY. (We were there for cider and they were an impulse buy).  Who knew that pie pumpkins look like the thing on the left, not the thing on the right?

Source

I had grand plans of making pumpkin chili and serving them in the pumpkin (kind of like here) but as usual with my grand plans I didn't get around to it and then the pumpkins started to rot.  Not one to waste food I decided to roast them and figure out what to do with them later.  The roasted pumpkin sat in the fridge for a few more days before I was once again in danger of wasting food so decided to try pumpkin bread.

Here is my recipe, adapted from Mark Bittman's Any Fruit/Vegetable Any Nut muffin recipe (in How to Cook Everything).

Pumpkin Bread

1 1/2 cup all purpose flour
1/2 cup whole wheat flour
1 cup sugar
1 1/2 teaspoon baking powder
1/2 teaspoon baking soda
1 teaspoon salt
4 Tablespoons vegetable oil
3/4 cup orange juice
1/4 cup milk
1 egg
1 cup pumpkin
1/2 cup nuts (I used walnuts and pecans)
1 Tablespoon cinnamon
1 teaspoon ginger
1 teaspoon nutmeg


***To roast a pie pumpkin just cut it in half, scoop out the seeds, place cut side down in in baking pan and roast at 375 until soft (usually about an hour).***

Mix the dry ingredients together in a large bowl.  Mix the wet ingredients together in a separate bowl and then combine.  Spoon into a greased 9x5 pan and bake at 350 for about an hour (until an inserted fork comes out clean).

This makes a really dense, moist bread.  The pumpkin, orange and ginger combine to make a unique blend. I brought it into work and one of my coworkers said she could really taste the pumpkin, it tasted like a vegetable (I took it as a compliment even though I'm not sure she meant it as one).

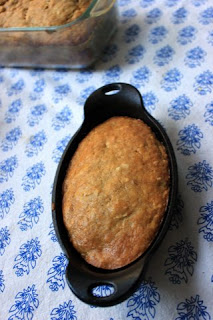
The pictures I took turned out terrible.  A combination of it being dark out when I made it and still learning the semi-automatic settings of my camera.  Here are a few that turned out okay.


I had a bit of extra batter so I put some in these cast iron thingies (I'm so up on my kitchen terminology).  I actually liked the bread that ended up in these the best - maybe because it was smaller and the iron could distribute the heat more evenly.  Or maybe it is mental and I just think everything cooked in cast iron tastes better.  Have I mentioned I love my cast iron cookware?  I think I have.


Saturday, October 26, 2013

Homemade Pantry: Green Tomato Apple Chutney

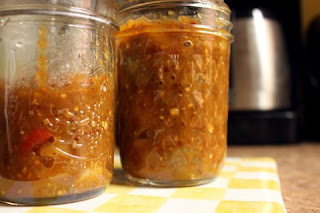
On Tuesday night this week the forecast called for below freezing temperatures (first time this fall) so I went out and cleared our tomato bushes.  I've made this green tomato curry in the past and it is okay -- good for produce otherwise destined for the compost pile -- but wanted to try something different.  I came across this recipe which called for green tomatoes and apples, which we have a lot of from our CSA.  (So. Many. Apples.) I also had variations of all the other ingredients, so I gave it a go.


First taste was a thumbs up, I imagine it will be a good addition to this meal. 
 
Adapted from David Lebowitz

Yield: a bit more than a pint

2 cups green tomatoes, sliced into bite size pieces (no need to peel)
1 large apple, sliced into bite size pieces (no need to peel)
1/2 white onion, diced
1/2 jalepeno pepper, partly deseeded, (more if you like things spicy)
1 tablespoon ginger
1 tablespoon garam marsala
1 1/2 teaspoons course ground mustard
1/2 cup apple cider vinegar
1/2 cup sugar

Add all ingredients to a pot and bring to a boil.  Reduce heat and simmer for 45 minutes.  During the last ten minutes stir every 30 seconds or so to make sure the bottom layer doesn't burn.

Note: this is not a canning recipe, I don't know if there is adequate vinegar to keep the ph in the safe zone.  I plan to freeze what we won't use in the next couple of weeks.
Monday, October 14, 2013

Homemade Pantry: Applesauce

It has been awhile since I've done a homemade pantry post! We've been getting a lot of apples in our CSA.  We like apples but we've been getting lots of other fruit too - plums, peaches, and nectarines oh my! - so we've been ignoring the apples since they have a longer shelf life.  Awhile back I noticed they might just be going bad so I made and canned some applesauce.


Canning them took a total of two hours. Peeling them was by far the most tedious part.  I've put this on my Amazon wish list - the next time I'm looking to push my purchase over $25, I may just invest.*  Roxy was happy to pick up any pieces that made it to the floor.


I followed the recipe in my Ball's Complete Guide to Home Preserving cookbook but they also published it online (see the link).  I've mentioned before that I take a lot of liberties with recipes and use them more as guidelines.  This is NOT true with canning.  Unless you really know what you are doing, you need to follow recipes exactly (particularly the ratio of lemon juice or vinegar).  Botulism is not something to mess around with.


The apples got chopped and mixed with sugar (1 cup not the 3 the recipe calls for), and lemon juice. You heat them up with a touch of water until they are soft enough to mash.

 I used my immersion blender but left it pretty chunky. 


I got enough to make five pints and to have a bit of applesauce with my tea.


 Canning is not hard, here is what you need:

1. Canning jars.  I've stuck with ball regular mouth (you can get wide mouth jars as well).  You can reuse the jars and the rings but make sure to use a new lid every time.  Conveniently, Ball sells the lids separately.


2. A large pot.  You can get a designated canner, but as long as there is enough room to completely submerge the jars you can use any old pot.  I bought mine for $2 at an estate sale.


3. Jar lifter, magnetic lifter, jar funnel.  These are specifically designed for canning.  The jar lifter helps you put the jars in/take them out of boiling water.  The funnel makes it easier to fill your jars.  The magnetic lifter makes it easy to get your lids out of the simmering water. A chopstick is helpful as well to release air bubbles.


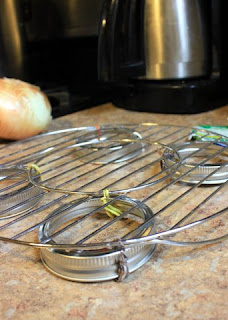
4. A canning rack. This just needs to lift the jars up off the bottom of the pot so water can circulate under them.  You can buy a rack specifically designed for this.  Kevin rigged this up for me with what we already had.


As for how to can, there are a lot of good resources.  This blog post lays it out step by step. There are a lot of steps so it can be overwhelming, but none of them are particularly hard or time consuming.  If you have lots of apples like we do (the apples I canned got replaced the next week through our CSA) it is a good way to preserve them for the winter.  We also have a lot of pears, I have a feeling pear sauce may be next for me.

Thursday, May 16, 2013

Homemade Pantry: Granola

This post is a bit of a misnomer.  Granola was on my list of things to start making at home and then I read the ingredient list of the Wegman's brand granola we get:


It is really pretty good.  I don't think I'd add soy lecithin if I were making it at home but otherwise I'm happy with what is in there.  So I will cross this off the list of things to make from scratch.

But as an update, I have continued to make yogurt at home.  So much that a couple of weeks ago when I knew I wouldn't get a chance, I picked some up at the grocery store and Kevin raised his eyebrows at me.

My favorite way to eat it is with some defrosted frozen berries, a bit of maple syrup, and granola.  It makes a good breakfast or snack.


Monday, April 29, 2013

Homemade Pantry: Pancakes

I was wrong Thursday when I said chicken stock was my first foray into making things from scratch.  I have always made pancakes from scratch.  I don't think that people who buy pancake mix realize there are only seven ingredients in pancake mix, and if you have even a minimally stocked pantry/fridge, you likely already have the ingredients.

Seriously: it is flour, salt, sugar, baking powder, milk, eggs and butter.  I like to add cinnamon and vanilla as well as fruit, but those are optional.

I use the this old Joy of Cooking cookbook for the recipe.  This was my mom's, she used it the whole time I was growing up.  You can see the pancake page is well used.


(some sort of math I or my sister did as kids in the margin).

Making pancakes is something I associate with my dad.  We used to make them together on Sunday mornings.  I remember measuring everything out and how we would double everything but the sugar.  I would argue that the sugar should be doubled too, to stay authentic, but he didn't buy it.  I now put in half the sugar called for as well.  It is a good memory.  Going to the gym every Saturday morning for several hours to lift weights and play basketball from age 8-16 (I rebelled at 16) is less of a good memory.  That was a chore.  He was disappointed I wasn't going to be a basketball star, I was happy to have my weekend mornings back.  My sister was a basketball star and ended up being a basketball coach, so at least one of us made him happy.

We made pancakes when he visited for Easter.


Kinsey got a scratch after breakfast.  He was happy.

(that's his happy face).


Thursday, April 25, 2013

Homemade Pantry: Chicken Stock

Chicken stock was the first thing I started making at home instead of buying.  It is super easy and uses what would otherwise go to waste.  It makes rice and risotto so much better.  That is a win-win-win in my book.

We keep this ziplock bag in the freezer and throw vegetable scraps and chicken bones in it as we go.  Once we need stock it just all goes into our "superpot."  The superpot is a combo slow cooker/rice cooker/pressure cooker.  It even has a brown setting so you can brown meat right in it before slow cooking.

We use it several times a week.

Anyway, I just throw the veggies and chicken bones into the pot with some salt, pepper and bay leaves.  Then I pressure cook it for 30 minutes (slow cooking would also work).


Once the time is up I strain it through a cheese cloth lined  colander into our quart sized measuring cup.


I usually get about 4 quarts out of the batch.  I stick most of it in the freezer and then use it as we need it.


See, easy.


Monday, April 1, 2013

Homemade Pantry: Tortillas

I saw this


on Pinterest* the other day and noticed it called for whey, which I have a lot of from this. I realized we had peppers, onion and ham in the fridge (the original plan was a southwestern omelet) but no tortillas so I decided to give it a try.


Will I lose my homemade credibility if I admit I used crisco?  The recipe calls for lard or hardened coconut oil but I didn't have either (maybe someday when we get a half pig for our yet to be bought extra freezer I'll have rendered lard on hand).  I could have used butter, but I generally fail at creating butter pastries.  We bought crisco for seasoning our cast iron pans and I (hanging my head sheepishly) sometimes use it in baked goods.  Only very rarely though, because I know it is bad for you (the term "partially hydrogenated" is in every ingredient listed).  

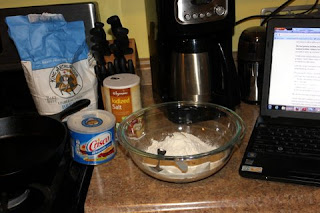
Anyway, the recipe is only four ingredients:  some kind of flour (I used bread b/c that is what we had), salt, some kind of solid fat, some kind of liquid (the recipe called for milk, whey or water).  I still have lots of whey from the Greek yogurt.


You mix the flour, salt, and fat together until it forms clumps and then slowly mix in the warm liquid to form a dough. Knead it a bit and let it rest 20 minutes.  Easy enough.


At some point I realized I had an audience.


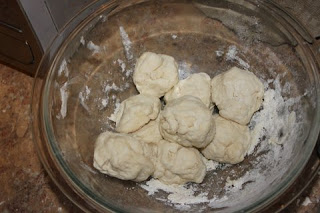
The clothes in the basket were dirty so I let him stay there.  After the rest period I formed the dough into eight balls and roll them out to thin disks.


I used our new Lodge cast iron griddle (ode to Lodge cast iron will be posted in the future) and after the first couple realized:
  1. I shouldn't have oiled the cast iron (the later ones were better, less greasy)
  2. The tortillas needed to be really thin
  3. The griddle needed to be really hot 


I realized the meal didn't even need the eggs - the ham peppers onions with cheese and salsa wrapped in the tortillas were plenty.


Someone else thought it looked/smelled irresistible too:


(I didn't share).


*Yes, I'm on Pinterest (pretty late to the party but I like it for organizing house decorating ideas).  You can find me as my internet alias Rowena Coughlin (NOT my real name).